Video tutorials
How to make an AI Halloween costume-change video
Film one take, create costume references, then cut AI wardrobe edits on your finger snaps. Includes prompts and the timing fixes used for Cole’s videos.
In this guide
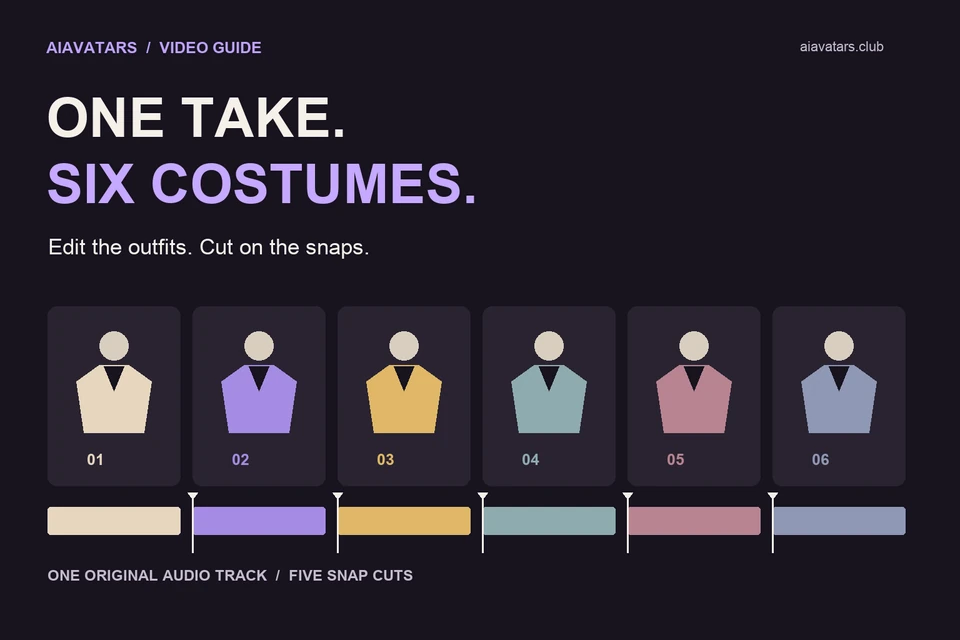
Film yourself once, then change costumes on each finger snap. The useful trick is to generate a separate version of the whole performance for every outfit, then cut between those versions in an editor. You do not need to perform every costume change on camera.
This guide follows the method used for Cole’s Halloween videos: a vertical phone recording, single-frame wardrobe edits, Higgsfield Genjutsu Light video edits, and a final timeline pass. The prompts below are reusable versions of that workflow.
What you need before you start
- Your own vertical video: a steady shot with your face, outfit and snapping hand clearly visible. Use a short take within the video model’s limit.
- A clear frame from that recording: this will become the costume reference. A close-up photo of your face can help the image editor retain details.
- An image editor that accepts reference photos: you need to edit the source frame, not generate a different person in a different room.
- Higgsfield Genjutsu Light / Lite, Object Swap: this was the video model used for the examples. Generation is paid; check the displayed cost before each run.
- A video editor with multiple tracks: you need frame-by-frame trimming, your original audio and hard cuts.
Availability: the exact wardrobe node used for Cole’s batch ran in a local development version of AIAvatars. This guide does not depend on a public one-click AIAvatars costume template. The provider route and the manual edit below let you reproduce the method without that template.
1. Record one performance with clear snaps
Fix the phone in place and record vertically. Keep your whole costume area in frame, with enough space above your head for hats. Use steady lighting and a background that will be easy to compare between versions. Keep your snapping hand away from your face when possible.
Start in a neutral pose, snap, hold briefly, and repeat. Leave a little usable footage before the first snap and after the last one. Cole’s source take was about 14.4 seconds with five snaps, enough for six looks in a finished cut. Your take can be simpler: two snaps and three looks are enough to test the effect.
Keep the original audio. Those snap sounds will be the timing reference for the entire edit. Do not add camera moves, costume props and a complicated performance to the first test at the same time.
2. Edit one real frame into each costume
Export a sharp frame where your face and clothing are visible. One public option is ChatGPT Images: upload the frame and ask for the wardrobe edit using the prompt below. OpenAI’s image-editing guide explains the upload and editing controls. Give the frame to your chosen image editor as the image to change. If you add a close-up, tell the editor that it provides facial detail only. It should not replace the source frame’s head angle, expression or pose.
Change the wardrobe, not the person. Keep the room, camera position, body proportions, hands and face. Describe a specific outfit: jacket, shirt, trousers, footwear and any headwear that is actually visible. Avoid adding a handheld prop unless you are prepared to troubleshoot its movement.
Replace the bracketed text in this image-edit prompt:
Image 1 is the original photograph to edit. Keep this exact person, face, expression, head angle, body proportions, stance, hand positions, room, lighting and camera perspective.
Image 2, if supplied, is a close-up of the same person. Use it only to clarify existing facial details. Do not copy its pose or expression.
Replace only the clothing with [DESCRIBE THE COMPLETE COSTUME]. [DESCRIBE ANY HEADWEAR CHANGE, OR SAY TO KEEP THE EXISTING HAIR.] Keep the existing body shape and natural fabric fit. Keep both hands empty.
Preserve natural skin texture and the person’s actual facial features. No beautification or actor substitution. One person, one photograph, one view. Keep the original framing and background. No collage, turnaround sheet, text or watermark.
Compare the result with the original before making a video. Check the eyes, jaw, nose, hairline and beard if applicable. If the image already looks like someone else, fix it now.
What changed in our workflow: the early multi-view costume sheets drifted away from Cole’s likeness. The successful video references were wardrobe edits of the actual standing frame. The full character sheets seen later in the finished edit were display overlays, not the references that drove those successful videos.
3. Generate one continuous video per costume
The public Higgsfield route is Video → Higgsfield Genjutsu Lite → Objects swap, as described in its October 19 release notes. The API names the model Genjutsu Light. The official Object Swap playground provides the source-video, reference-image and prompt inputs. Account access and credits are required.
Upload the original phone recording and the approved single-frame costume edit. Choose 720p for a first test, matching the setting used in our batch. Lite’s release notes specify short clips of 4–15 seconds; trim your recording first rather than relying on an automatic cutoff. Check the current limits and quote in the generator.
Use a wardrobe-only instruction:
Change only the filmed person’s clothing and approved headwear to [COSTUME], using Image 1 for wardrobe details.
Keep the actual filmed person’s face, skin, body and facial hair. Do not replace them with an actor or another person. Keep both hands bare and empty. Preserve the original room, lighting, camera angle, framing and background.
Follow the source performance, including every finger snap, arm movement and head turn. The reference image supplies the outfit only; do not copy its static pose or crop.
Keep this complete outfit from the first frame to the last. One continuous performance. No cuts, costume transitions, added props, text or logos.
Generate and review one costume first. Watch the whole clip, especially the face, hands and clothing during movement. If that test works, repeat with the other approved wardrobe references and the same original video. Do not ask one generation to switch through all the costumes.
Each additional costume is another paid video run, plus any image-edit cost. A failed or unsatisfactory result may require another attempt. Decide your batch size after inspecting the first take.
4. Align the gestures before cutting
Put the original video and its audio on your editor’s timeline. Add each costume version on a separate video track, starting at the same point. Mute the generated clips so the original recording remains the audio master.
Find each snap in the audio waveform and place a marker. Then inspect the generated hand gesture around that marker, one frame at a time. A matching start time does not guarantee matching motion: in our Light outputs, gestures shifted by a few frames, with observed differences of roughly two to five frames.
Slip or trim each costume segment until its gesture lands on the original snap. Check every transition; one correction at the beginning may not fix the whole take. If a segment needs a small speed adjustment, keep it local and recheck the movement. Do not stretch the original audio to chase a drifting generated hand.
5. Hard-cut the outfits on the snaps
Choose the look before the first snap, then the next look for the following section. Cut at each aligned snap marker. Five snap points give you six visible sections, so six looks are enough for one version. Cole’s larger set of costume takes also allowed different combinations from the same recording.
Start with hard cuts. A dissolve shows both outfits at once and usually makes the change feel less clean. Check the frames on either side of every cut for a face jump, moving furniture, a misplaced hand or a flash of the old costume. Try a nearby cut point or a different costume pairing when the poses do not match.
6. Add optional sheets, sound and color
The costume sheets are optional decoration. If you use one, fit the entire sheet inside its frame rather than cropping away the side or back views. Place it in empty space, away from the performer and the platform’s caption area. Match the displayed sheet to the costume currently on screen.
A short snap sound effect can reinforce the original snap, but keep it aligned and balanced. Match brightness and color between takes so the room does not pulse at every cut. Export vertically at your timeline’s frame rate, then watch the export on a phone with sound.
Fix the common problems
| What you see | What to change |
|---|---|
| The costume looks right, but the face is different. | Return to the source-frame wardrobe edit. Correct likeness before paying for more video generations. |
| The video copies the reference image’s still pose. | State that the image supplies wardrobe only and that movement comes from the original video. |
| The snap sound comes before the hand gesture. | Align that generated segment to the original audio marker frame by frame. |
| The room or framing jumps at the cut. | Check the references and preservation prompt. Try a nearby cut point; reject takes with large geometry changes. |
| The overlay cuts off part of the character sheet. | Use fit or contain scaling, with a frame around the complete image. |
Start small: one recording, one costume reference and one video generation. Check your face and the snap timing before building the rest of the wardrobe. That is the part that makes the finished effect believable.